Pots and Cans

Pots and Cans

Friday, February 26, 2021

OH CALAMITY!

Disaster has struck! It was all going swimmingly until the plumber struck a radiator sized iceberg and caused the thing to break the freshly plastered wall. 


Disaster has struck


Here’s the thing about radiators they’re very heavy. Here’s the thing about plasterboard walls – they’re not really made to hold heavy radiators without some kind of timber reinforcement in place. It helps if numpty plumbers check this sort of thing out first before throwing up rads in that gung-ho manner of theirs and hoping it’ll all turn out hunky dory. 


Plasterboard fixings not man enough for the job


Heavy radiators not properly fixed to the wall


I foresee a repair bill of Titanic proportions to rectify the problem. In their wisdom, the builders have decided to fix a piece of thick ply behind the plasterboard wall then re-plaster the wall. 


Patch up job on the wall

Whether this type of repair will enable the radiator to be successfully held in place for years remains to be seen but who am I to question these peeps on such matters, I’m just the sucker footing the bill. 

Aside from shaking the magic money tree to cover the cost, what it does mean is that I now have only 3 days to re-mist the wall before the cack-handed plumber returns. Seriously if I could do these jobs myself, I would as you can’t trust anyone these days to do things properly.


It never rains but it pours


Sunday, February 21, 2021

HIGH AND DRY

Just how long does it take for fresh plaster to dry?  Well, it very much depends on which website you look at.  Plastering pundits quote anything from 3 days to 21 days but in this cold, damp wintry weather and with no radiators in the bedrooms then your guess is as good as mine.


Downstairs hallway now plastered
 

It’s been almost a week since the first room was plastered and damp patches are still in evidence.  I’m loathe to put any paint on the walls even a mist coat for a few more weeks much to the frustration of the head builder who insists it’d be OK to paint after 3 days and is chasing me to do so.  I’m standing my ground on this one matey.

Drying very slowly


Mist coating the walls behind the radiators
 

This is one of the downsides of having a company taking care of your entire project.  They have a schedule to keep that fits in around all their other jobs so you end up feeling rushed, press-ganged into doing things before you are ready to.


Work in progress

The benefit of managing your own project piece by piece is that you retain control of the timeframe giving you a bit of breathing space between phases and time to slowly gather ideas/supplies and funds for each bit.  I think for Phase II this will be our approach.

Also contrary to the internet, I might add that there does not really appear to be a great financial benefit of getting in a refurbishment company to do it all in one big project unless perhaps you are doing up a whole house where you may reap the benefits of economies of scale say in the plastering or electrical work. 

For example, the electricians we’ve had in seem to apply ‘a fixed price per piece’ formula in their estimating rather than a standard day rate so size of job doesn’t really matter but number of items to be added/changed does.  This makes it far more lucrative for them as from what I’ve seen most of the electrical work so far, it could have been done in about 2-3 days making a standard day rate a much cheaper option for us.


Pathson Industrial lighting


Hexagonal ceiling rose


Scolmore Click Deco in polished chrome
 

The other disadvantage of having a refurbishment company is that their ‘cut’ is most likely added on top of the cost of the individual trades again pushing up the cost of your project.  If you have the time and the skill to manage your own project then this would be my advice especially if money is tight as you can shop around for tradespeople to meet your budget and keep more of a handle on the overall project budget and work each phase at your leisure.

And now for some crocuses...


Spring has arrived


Our back garden is bursting with colour


And crocuses


Saturday, February 20, 2021

WINNING WINDOWS

If there’s one thing nobody likes its wind in their willows.  Old houses have notoriously draughty windows, ours is no exception and inefficient draught-proofing only leads to higher bills.  And if there’s another thing that nobody likes it’s having a heating bill the size of a small planet.  Mercury is tolerable but if you’ve got a Jupiter sized bill then you’re in trouble. 

Like a snazzy looking front door, windows add kerb appeal to your property and with an unlimited budget you can have everything from fancy stain glass to gothic arches.  In our project, fashion and function have reached an amicable compromise replacing old plain, draughty windows with a slightly more decorative Georgian bar look.


New bedroom window
 

In keeping with the style of the original wooden front bay window, the new UPVC windows have astragal bars fitted to the outside of the glass rather than sandwiched between the panes of glass as is normally the case with Georgian bar windows.  Exterior astragal bars may be dirt gatherers but I feel these enhance the look of a window by giving it more of an authentic period feel rather than just having a plain sheet of glass.  They look classy too. 

When choosing this type of window, it’s worth paying that little bit extra to ensure that the panels have equal sightlines.  Bah another gimmick!  No, it’s not and worth every extra penny to ensure your windows have a harmonious and symmetrical appearance from the outside especially if part of the window has a section that opens such as a top fanlight.

Windows without equal sightlines may look oddly uneven, not that most people probably give this a second thought but when you’re as picky as I am, symmetry is important.  A tad annoyed that the crossing bars in the middle of the main bedroom window were not centrally aligned.  Should have gone to Specsavers – the glazers, not me!


Crosses in the centre panels not aligned in the middle

With the added insulated plasterboard lining the cupboards and new properly sealed windows, upstairs is already starting to feel a little less like a fridge and a little more like a cosy nest.


New window in guest bedroom


New window in upstairs hallway


Friday, February 12, 2021

GETTING PLASTERED

After 3 days of trowel and trouble, we have beautifully plastered walls.  There’s not a crack in sight (or woodchip).  The house may be freezing and covered in that fine powdery dust that accompanies building work but now you can almost begin to imagine what the place will look like after a decent coat of paint. 


BEFORE - Guest bedroom


AFTER - all nicely plastered up

BEFORE - just look at those uneven walls

AFTER - all lovely and smooth


It’s at this point in time that I begin to get excited, spending hour after hour browsing through colour cards and designer paint websites trying to get an idea of which glorious shade of emulsion to pick for each room.  And boy, there’s no shortage of colours or brands of designer paints to choose from or limit on cost other than your own bank balance.  

Leading brands such as Farrow & Ball, Sanderson or Designers Guild begin at over £80 plus for a 5L tin.  If you’re not careful you could splurge your entire refurb budget on paint leaving little cash for the other fripperies such as coving, curtains and cats.   Being a super scrimper, I’ll be scouting round for the best paint deals and checking to see if I can find a close Dulux match that’ll do the trick. 


AFTER - not a crack in sight

AFTER - just letting it all dry

AFTER - already looking better

The fun/disruption is set to continue next week with new windows being delivered on Monday and plasterers booked to return from Wednesday onwards to finish the sections around the windows and continue with the downstairs hallway. 


AFTER - staircase plastered

BEFORE - boarding up the ceiling
 

Electrical second fix including replacing the consumer unit is also booked for next week.  It’s often easy to forget that an existing electrical set up may need upgrading to cater for all the extra power points you ask for and a budget allowance should always be made for this.  Any good electrician will soon tell you if your wiring is up to scratch and most without even prompting! 

Meanwhile, we’ll be taking full advantage of the huge empty skip sat on the driveway to clear away any other surplus rubbish we can find.  Well after all, I am paying through the nose for it.


Monday, February 08, 2021

COMPROMISE

Aagh it’s so noisy I can’t hear myself blog!   It’s been one hell of a week - a succession of tradespeople beating a path to the door and an increasing amount of noise, mess and surprises; some good and some not.  I’m surprised none of the neighbours have dobbed us in to the Covid police for breaching lockdown rules. Yep, the refurbishment rave is in full swing – bring a hard hat!

Here’s a quick peek at progress after the first week:


Doing a 'John & Yoko' sleeping in the lounge

No room at the Inn

Carpenters have been in to rip out the old cupboards in the main bedroom and put them back in again.  My dreams of a 5 door walk-in wardrobe chucked in the skip with the old plasterboard and timber because the original loft conversion turns out to have been a large bodge. 

Before - back wall

Before - window wall

Before - the wardrobe wall
 

Compromise is now the name of the game.  How to make do with what you’ve got but at least make it better than it was.  Not a happy bunny ☹ 

Bodge 1 - Turns out the corner cupboard that was scheduled for demolition to bring extra space into the room can’t be removed because it is essentially propping up the roof.  After ripping out all the plasterboard, exposing the timber supports and realising this, the carpenters had no choice but to put it all back again as it was.


BEFORE - corner cupboard

DURING - Stripped to the bone

AFTER - Rebuilt, insulated and bigger doorway
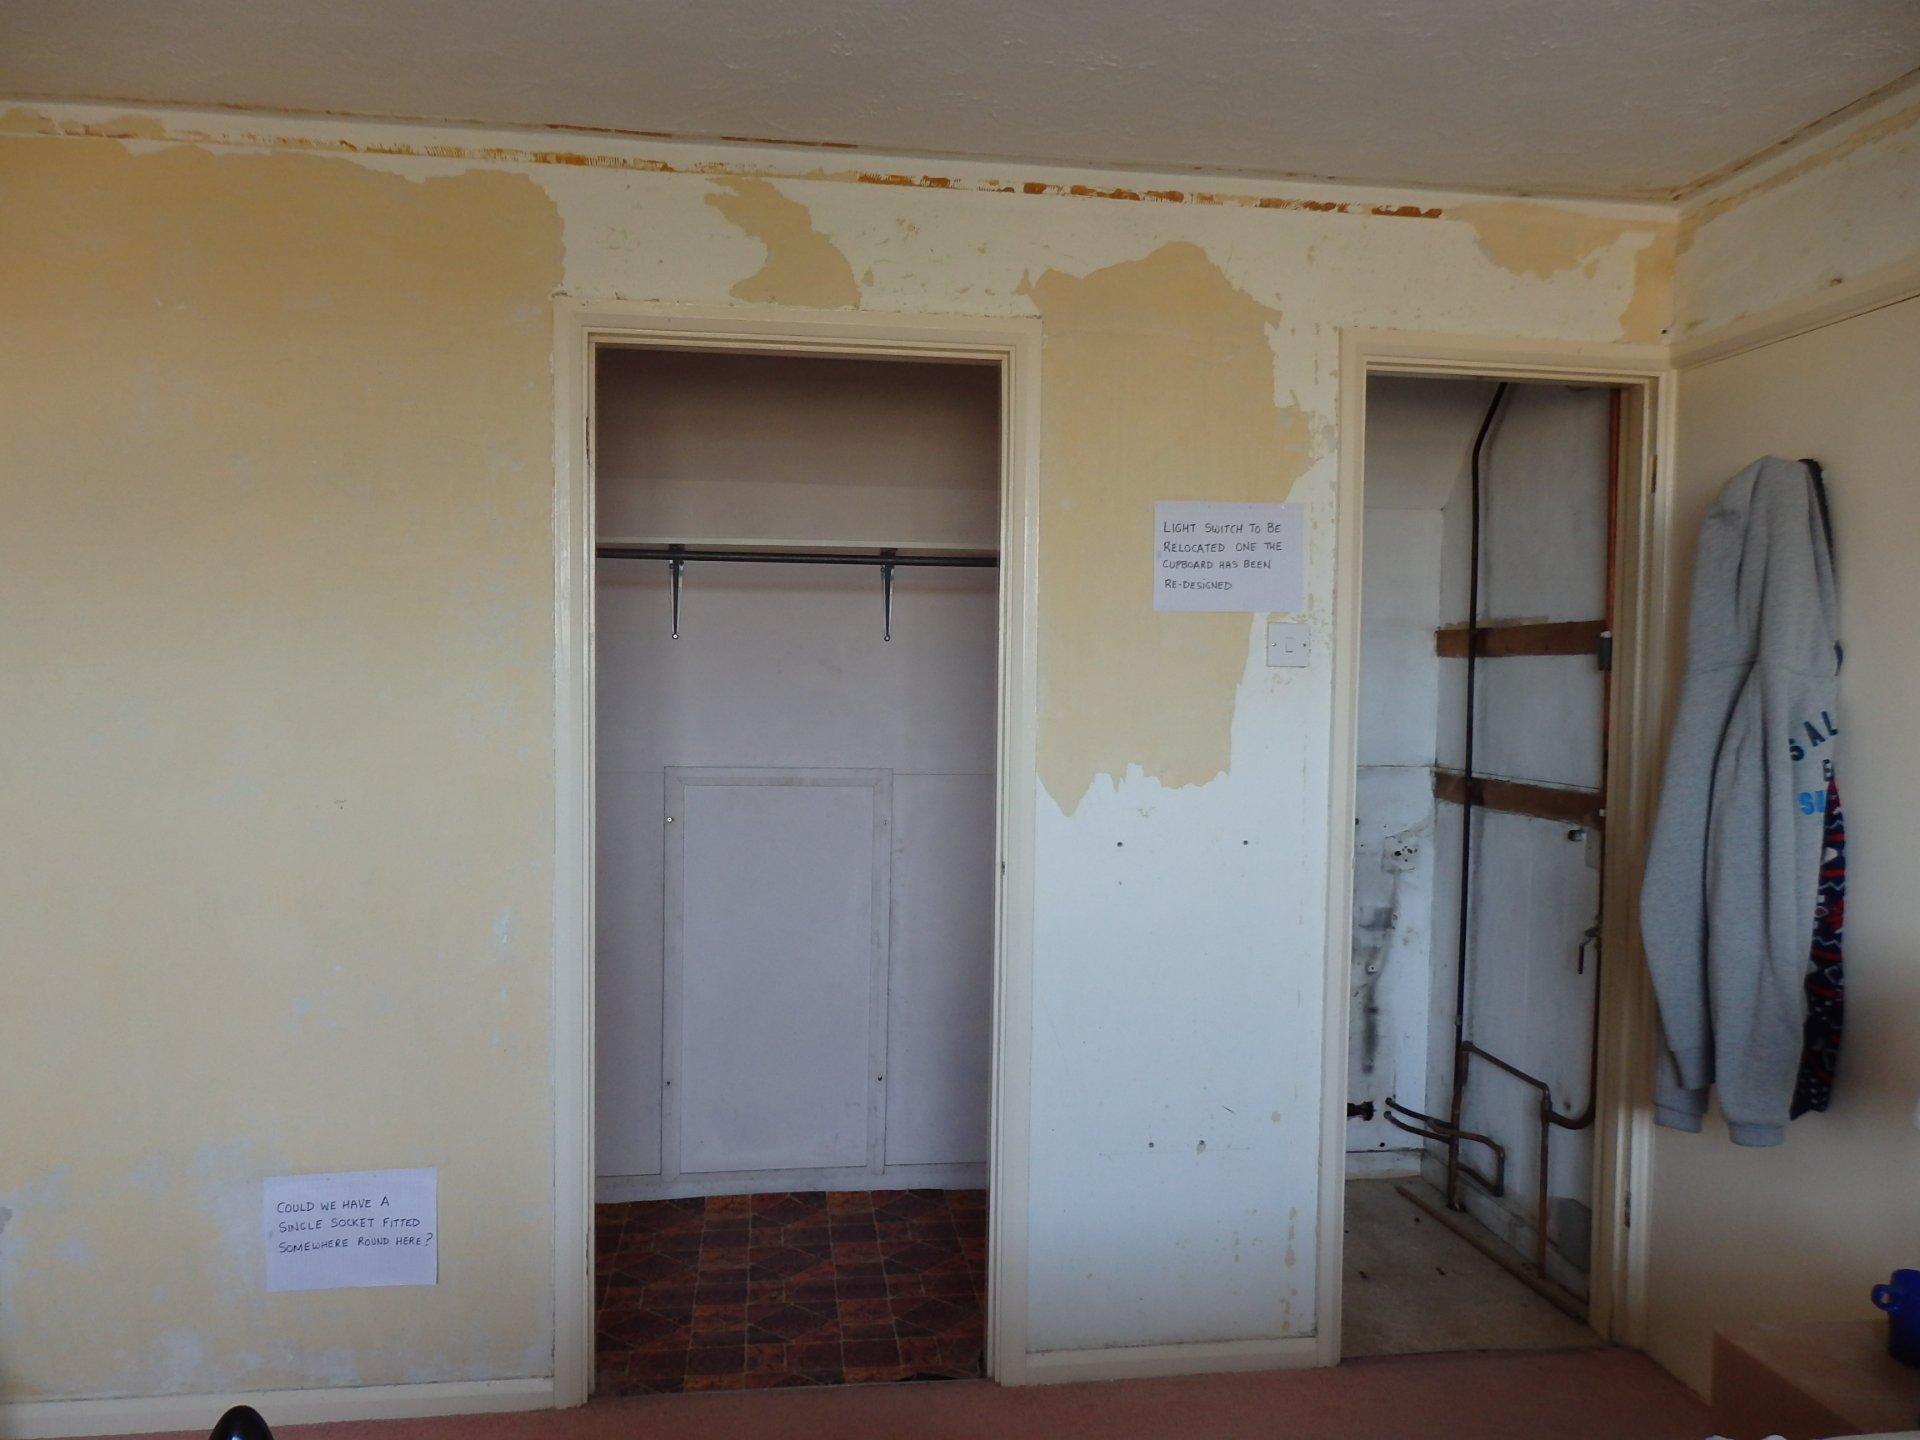
Bodge 2 – Instead of running pipework to the water tanks in the loft along the main walls, the previous builders had just run them vertically up in the loft crawl space that is behind the main wardrobe so the stud wall at the end can’t be removed to make the wardrobe longer because there’s a rat’s nest of pipework in the way.


BEFORE - the existing cupboards

DURING - ripped apart ready for face lift

AFTER - remodelled into 2 larger units


BEFORE - unsightly heating pipes

AFTER - pipework boxed in

The news that I can’t have what I wanted is about as welcome as a turd in a swimming pool.  I feel short-changed but I guess it’s important to realise that these refurbishment projects are all about compromise as you really don’t know what can be done until you’ve stripped the guts out of something then stood back to take stock.


What a mess!

The upside of this seemingly fruitless (and expensive) endeavour is that all the cupboards have now been insulated with some heavy-duty plasterboard making them less draughty, all unsightly holes and pipework neatly hidden away before plastering.  

Let’s hope there are no other disappointments to contend with.  I guess the moral of this post is that managing your expectations is as important as managing your refurbishment project.  In life you don’t always get what you want thus it’s always best to have a Plan B up your sleeve. 


It's snowing