Pots and Cans

Pots and Cans

Saturday, December 17, 2022

HOW TO MAKE A TIN FOIL HOLDER

Whenever I visit London in December I always seem to come back with an unexpected (and unwanted) Christmas gift.  Three years ago it was Covid, this year it’s a horrible stinking cold.  

Despite looking like Dick Turpin on the 472 to North Greenwich, I left myself open to chance as I wasn’t wearing any gloves so no doubt placed my hands on top of all those bacteria laden, snot laced passenger safety bars that haven’t seen sanitisation since the fall of the Roman Empire.    


TFLu

I guess I should be thankful that it wasn’t anything nastier such as Strep A – there were enough coughing under 5s on said bus to infect the whole of France.  Why don’t people leave their germ ridden little darlings at home when they go shopping?


Keep coughing children at home!

As I can just about make out the keyboard amid this pile of snotty tissues then I’m going to leave you all with an extra special Christmas gift (germ free) in the form of this super smashing tip (the other half has expressly forbidden me to use the word ‘hack’) to help you efficiently store all those roles of tin foil in readiness for the great Christmas cook up. 

The inspiration for this super smashing tip came to me in a Woolwich charity shop when I spotted one of these and in that instant had a hallelujah moment. 

Don’t panic – you won’t need to go nuts scouring charity shops to achieve this effective method of storing your spare rolls of foil, cling film or anything else that fits because you can find this very useful little item in IKEA.  It’s called a Skadis storage basket set designed primarily to be used with their holey pegboard but it can also be turned into a kitchen cabinet door hanging organiser.


Skadis 3 basket set

Note - This idea only works inside kitchen cupboards where the door is set back from the internal shelves as there needs to be a sufficient gap to accommodate the organiser and still be able to close the cupboard door.  The depth of the Skadis basket is approx. 7 cm so the gap between shelves and doors needs to be of this size or more.


Gap needed between shelf and door

To convert your Skadis basket into a hanging cabinet door organiser, firstly you will need to remove the 2 metal hooks on the back.  The other half kindly obliged using a Dremel tool with a disc cutting attachment, slicing the things clean off the back. 

Next work out where to hang your organising basket.  This very much depends on the internal layout of your kitchen cabinet but I found the best way to do this was to consult Mr Gaffer.  Cut a strip of gaffer tape and run this halfway across the back of your unit then literally stick the thing to the inside of the door then close it.  If the door shuts properly then you know you’ve hit pay dirt.  If it doesn’t just keep re-sticking the basket up and down the door until you find the sweet spot.

Whilst the basket is taped to its final position, grab a pointy bradawl tool and carefully make a couple of marker holes in the mesh part of the basket just under the solid white rim.  Screw the basket into place using a couple of small stubby wood screws but remember these must be less than the width of your cabinet door so that they don’t stick out the other side. 


Carefully screw into position

Once screwed into position, remove the gaffer tape and hey presto, one tin foil organiser neatly tucked away inside the cupboard door.


The perfect place for kitchen rolls

Tucks neatly behind cabinet door

The Skadis basket set costs £8.50 for 3 wire mesh organisers which is a fraction of the price charged by sellers for tin foil/roll holders on Amazon or Ebay which can retail at over a tenner a time.   This super smashing tip will not only save you a couple of quid but you'll also get 2 extra smaller baskets into the bargain.  What’s not to like? 

Cough, cough, snuffle, sniff - Merry Christmas everyone!

Wednesday, December 14, 2022

TICKETLESS TICKETMASTER

This post is dedicated to all those gig goers out there who don’t have smartphones as I know you’re probably feeling the same frustration as I am with Ticketmaster & AXS’s decision to not issue print at home tickets.  

I’ve dedicated a lifetime and a small fortune to going to see bands live.  You can’t beat the atmosphere, excitement or thrill of seeing your musical heroes in the flesh and if I had my way, I’d squander all my time/cash just going from gig to gig on a continual lifetime album tour.  However technology or more precisely APPS are now souring this dream making it harder and harder to get your hands on paper tickets.


Making life a misery

Don’t get me wrong, I may be almost 60 but I’m not a complete techno-dinosaur.  I shop online, bank online, have a blog and do everything cyber via my trusty laptop but the one thing I don’t have or more importantly DON’T WANT is a smartphone.  Why complicate an already complicated life with a superfluous layer of technology?  I don’t need brainwashing or having all my personal data continually mined!
 

The real reason dinosaurs became extinct

But clearly Ticketmaster/AXS and other event organisers have automatically assumed that the entire world has a smartphone and therefore don’t need printed tickets.  This would be fine if you were given the choice – print your own at home (for free) or use an e-ticket on your phone but it would seem that choice is not an option. 


APPS are for SAPS

I understand they’ve probably done this to stop ticket touts or ticket fraud but hey, you’ve also alienated that small, law abiding phoneless minority in going down this road.  What is also ironic is that whilst paper tickets appear to have disappeared into the technological vortex, the service charges added to ticket sales have in no way reduced.  AXS added over £11 each to my Alter Bridge tickets for Monday night’s performance at the O2 but exactly what was that £22 paying for?  Paper?  Ink?  Postage?  I think not!


MacKay just about sums it up

Aside from box office anxiety, the live music experience certainly at the O2 in particular has become one big ball ache.  


Great gig 

Firstly, no food or drink is allowed into the arena and that includes any shopping you may have done in the new outlet mall.  I appreciate punters are expected to shell out for expensive refreshments at a gig.  I kid you not when I say that a small paper cup of pepsi is now almost a fiver and even a glass of still water will set you back £3.90 but I almost died at the thought of the Lindt chocolates I bought for Christmas whilst killing time before the performance being chucked into the wheelie bin by security.  Surely in this sustainable day and age, free water refill stations could be provided for those of us who don’t drink alcohol or indulge in gut/tooth rotting sugary drinks. 

Secondly, no bags bigger than a sheet of A4 paper are allowed into the arena thus discriminating against most women whose handbags can usually accommodate a kitchen sink.  If I’d wanted to smuggle in an AK47 or a Semtex belt, I wouldn’t be doing it in a Radley would I?  Once security have scanned your backpack then that should be the end of it.  Security should scan ALL backpacks and handbags or better still, just install full body scanners for everyone to pass through rather than target those with big bags. 

Thirdly, since Covid ticket prices have gone through the roof and for anyone who has ever sat in ‘the Gods’ at the O2, that’s pretty steep.  The starting price to see a class act like Iron Maiden is now around £66 and that’s before all those mysterious service charges are piled on.  It’s legalised extortion!  I could buy at least 3 Maiden albums for that price or a week’s shopping at Tesco.  The average gig going punter is not made of money you know. 

Fourthly, merchandise.  It’s now £35 for a tour shirt an almost £10 increase on pre-pandemic prices when the average concert tee retailed at around £20-25 beforehand.  Ironically on Alter Bridge’s own web site you can buy a T shirt for $30 or just over £24 at today’s USD exchange rate so my advice to gig goers everywhere is to purchase your band merch online before or afterwards but not at the O2.


Cheaper to buy online

And so dear readers having got this all off my chest, it looks like my gig going days are pretty much over.  I’m not going to be held to ransom by event promoters, technology giants or greedy money grabbing venues.  In future, rather than go through all of the above, I’ll just invest the cost of a gig ticket in buying the band’s latest album or treating myself to a new band t-shirt via their own website.


Alter Bridge

Having said all this, I am going to Depeche Mode’s stadium gig at Twickenham next June but that’s another story ….


Thursday, December 08, 2022

AN INSPECTOR CALLS

An inspector calls and for once it’s not a member of the local constabulary looking to drag me off on a trumped up charge of cat stealing or for not giving ‘respect’ to the server in MacDonalds at Chi Gate who took more than 20 minutes to dish up a box of chicken nuggets plus a McFlurry.  Come on, I’m starving!


Did that crazy cat lady offer you Dreamies?

Finally, after 6 very long, drawn out months of banging, crashing, drilling and dust making, our project has received the royal seal of approval from the council’s Building Inspector.  We have sign off!


Meow!  I like it

Crack open the bubbly and get ready to party like its 1999 but not until after all this dust has been wiped away. 

All that’s left to do is pack away the last of the DIY gear, bring in the dining room furniture and work our way through the final snag list of bitty bits then it should all be ready in time for Christmas. 

And whilst we beaver away through all those bitty bits, here’s a grand tour of the almost but not quite finished kitchen and extension:


BEFORE - the back door area


AFTER - no back door


BEFORE - the hob area


AFTER - a more modern look


BEFORE - the old kitchen window

AFTER - window replaced by archway


BEFORE - the unpapered corner


AFTER - has become the 'tea' station


The old kitchen space has been given a thoroughly modern make-over and it is definitely a vast improvement although strangely all those higgeldy, piggeldy storage units in the old layout did seem to accommodate more stuff.

From the garden, the view of the property is quite pleasing and everything blends in nicely but we've still a long way to go to get the back of the house looking tip top.  A new patio, pathway and fence is top of my santa list.


BEFORE - a lot of wasted space


AFTER - looks great


Tuesday, December 06, 2022

MAKE YOUR OWN NOTICEBOARD

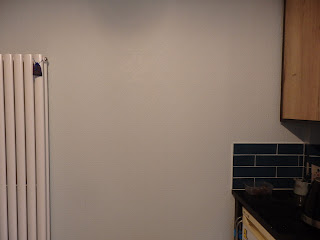
Putting the finishing touches now to the kitchen before it can be finally signed off as complete.  There’s just one thing missing on the papered wall and that’s a nice big noticeboard/whiteboard on which to scribble all those random notes about buying loo rolls or remembering to tax the car.


I think we need a noticeboard

There are some great noticeboards on Etsy that would be perfect for this space but not at £160.  Crikey, it’s only a noticeboard not the crown jewels!  Don't get me wrong, I've nothing against Etsy - if you've got a skill then monetise it but blimey, customisation is costly.  

A rummage in the garage produced an old cork noticeboard and a whiteboard planner so it’s time to reach for the MDF to make your own custom noticeboard. LLB would be so proud.

Here’s how to make one: 

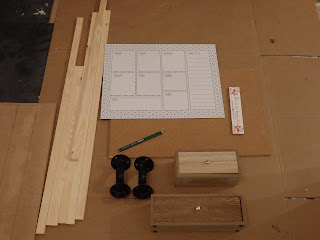
Decide on size and shape you want your noticeboard to be and think about what sort of things you might want on it – whiteboard/corkboard areas, drawers, hooks, etc


Things to put on my custom noticeboard
 

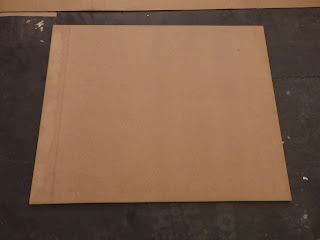
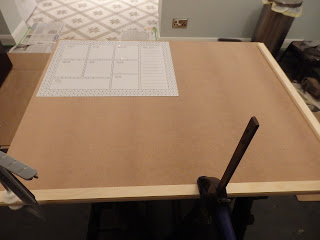
Cut a piece of 12 mm thick MDF board the size and shape of your noticeboard.  This will be used as a base board on which will sit a frame and all the other components.


MDF base cut to the desired board size

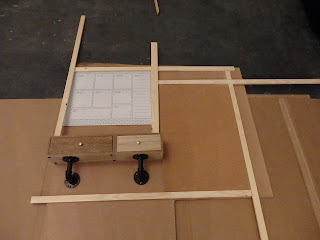
Dry position all components on top of the base board to determine the location  of the outer frame and divider strips.


Work out where you want your components

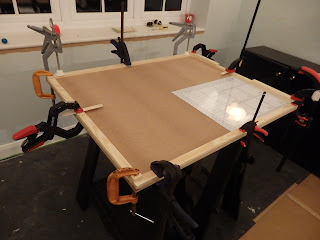
Using 11 mm thick pine battens (B&Q) cut lengths to make a frame for the outer edge of the base board.  Stick into position using strong adhesive then clamp down to keep the battens flat whilst the glue dries.  Leave to dry overnight.


Begin sticking the frame into place

Clamp and leave to dry overnight

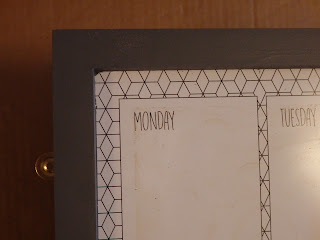
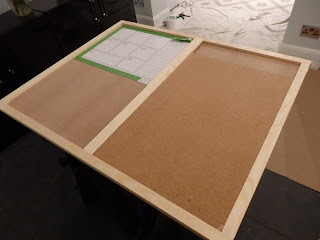
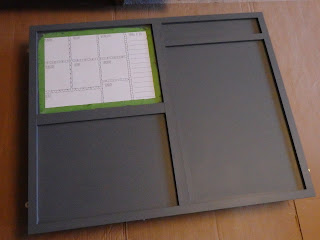
If you are using a whiteboard then stick this into position first so that the edges of the whiteboard can be neatly tucked under the frame lengths.


Edge of whiteboard should be covered by frame

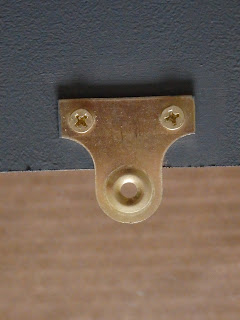
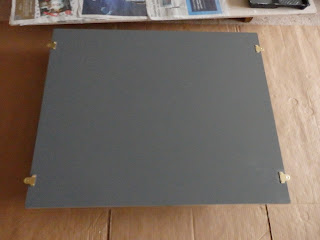
Turn the baseboard over and fit 4 hanging brackets.  We used picture frame brackets from B&Q so that the finished noticeboard can be securely screwed onto the wall.


Hanging brackets fitted to back of board


Fit 4 brackets to sides of base board

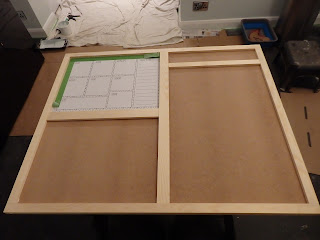
Cut pine battens to desired lengths to make individual frames for each of your noticeboard components.  We used different widths to add a bit of character to the central area.  Stick and clamp down as before.


Add other battens to create compartments

Stick battens into place then leave to dry overnight

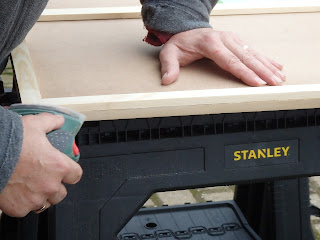
When the frame and all your central compartments have been added, fill any gaps at the joins with decorator’s caulk.  Sand down all uneven areas.


Sand down edges & uneven areas

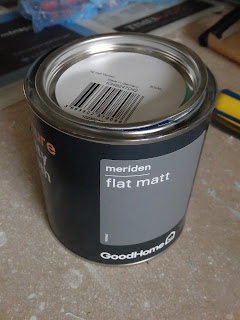
Now it’s time to paint your noticeboard.  I’ve used B&Q’s velvet smooth furniture paint (Meriden grey) as it is self -priming and gives a good finish when applied with a small sponge roller or brush.  Mask up any areas that you don’t want painted then apply 2 coats, sanding between coats with a fine grit sandpaper.


Velvet smooth furniture paint - B&Q

Apply 2 coats of furniture paint

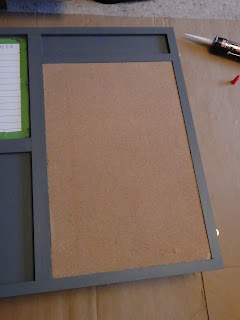
Once your noticeboard is painted, begin to add other components.  I’m adding a piece of corkboard cut down to size from an old office noticeboard and some little drawers. 


Glue corkboard into place

Cut corkboard to desired size then glue into position.


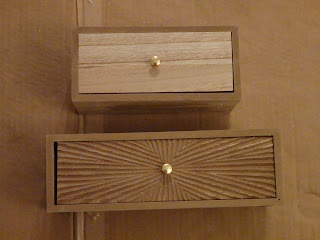
Small storage unit from The Range

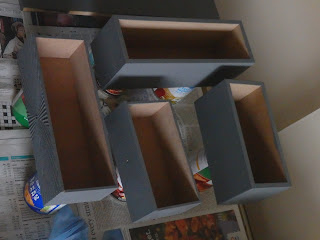
My small drawers started life as a two-tier storage unit purchased for £12 from The Range.  I carefully separated the drawers then painted them to match the board but you could make these a contrasting colour to jazz things up. 


Paint drawers to match noticeboard

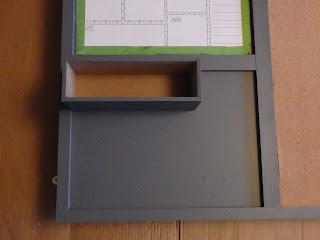
Glue the drawers into position onto the base board.  


Glue drawers onto the 


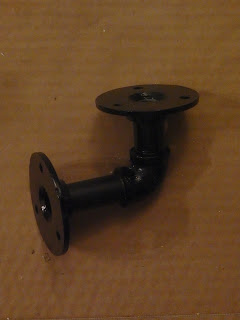
To ensure the drawers don’t fall off once they are weighed down by contents then I’m adding a pair of pipe brackets left over from another project to give the drawers extra support and decorative impact.  


Black pipe brackets

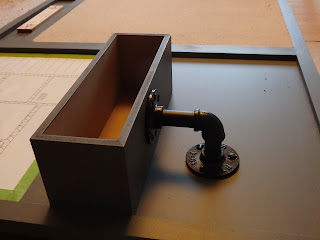
Screw the pipe brackets onto the baseboard centred under each drawer.  It’s quite hard to find small stubby black screws in places like B&Q so buy longer ones then grind off the unwanted piece at the back. 


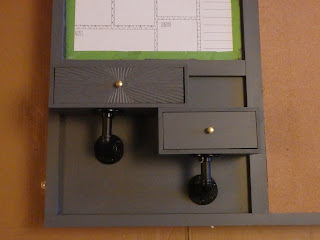
After the drawers are glued on


Screw brackets to the board underneath drawers


Add second smaller drawer

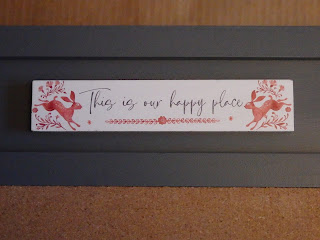
As a final touch, I’ve added a novelty sign purchased at a local garden centre that nicely sums up our new kitchen as being a special place.  You can add anything to personalise your board.  Glue into position.


Personalise your board with cute signs

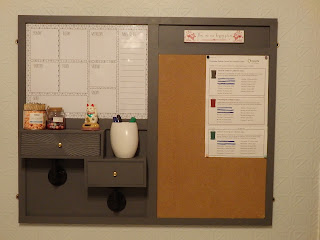
The finished noticeboard has been hung into position on the kitchen wall.  It looks amazing and a much cheaper alternative to those listed on Etsy.


Hung and ready to use