Right then. So far we have a large timber box filled with plastic and water that hasn’t leaked in three days. Great but it doesn’t really look very pretty, does it?
 |
| No leaks but very unsightly |
There’s that unsightly layer of overhang that needs sorting out. A bit like my muffin tops only it’ll be a lot easier to trim these off. Mine are going to need liposuction!
But before we take scissors to the offending surplus underlay and lining, we’re going to add a nice timber collar to finish off the top edge of the pond and hide everything else.
To
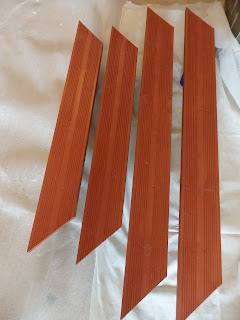
make the top collar, use some more pieces of reversible decking. This time cut the planks slightly longer than
each side to allow for the corners to be mitred. If you really can’t be bothered with all that
mitre nonsense then just use straight pieces as it really doesn’t matter. We used 2 x 2.4 m lengths of decking to cut
out 2 x 1.19 cm long sections and 2 x shorter sections each 0.94 cm long.
 |
| Top collar pieces |
Again,
waterproof your timber with a suitable weatherproof product and leave to dry
before fitting.
 |
| Suitably weatherproofed |
The
top collar is rather like making a picture frame that is going to sit along the
top edge of the pond structure. Each
section of the frame needs to be centrally balanced on the edge so that it
slightly overhangs both the inside and outside of the pond.
 |
| Top collar should overhang at the front and back |
Right, now you can get the scissors. Carefully trim off any excess liner/underlay so it is close to the top edge where it can’t be seen once the collar is fitted.
 |
| Time to get rid of the excess overhang |
 |
| Trim carefully with scissors close to the edge |
Screw
each collar section into position carefully, tightly abutting the mitred corner
joins – remember whatever you do, don’t pierce the liner below the waterline! It’s quite a feat fitting the collar as
unless you’ve made your pond with sleepers there is only a narrow edge for you
to screw into.
 |
| Align the mitred corners before screwing down |
And
now for the great pond unveiling – ta dah!
All it needs is a few plants plus a solar fountain to create a calming
oasis and habitat for any passing frogs or local wildlife.
 |
| Now top up with water to the desired waterline |
 |
| Finished pond ready for plants and solar fountain |
I declare our 'Special Landscaping Operation' to be a resounding victory - Russia take note!


No comments:
Post a Comment